Did you know we have a Sticker Maker which allows you to design your own stickers from scratch?
Whilst we have a huge range of stickers to pick from, sometimes teachers & teaching assistants prefer something a little more personal. That’s why we created the Sticker Maker!
You can make any size of our stickers, square and circle, to look any way you’d like. Here’s how:
![]()
Step 1: Pick your product
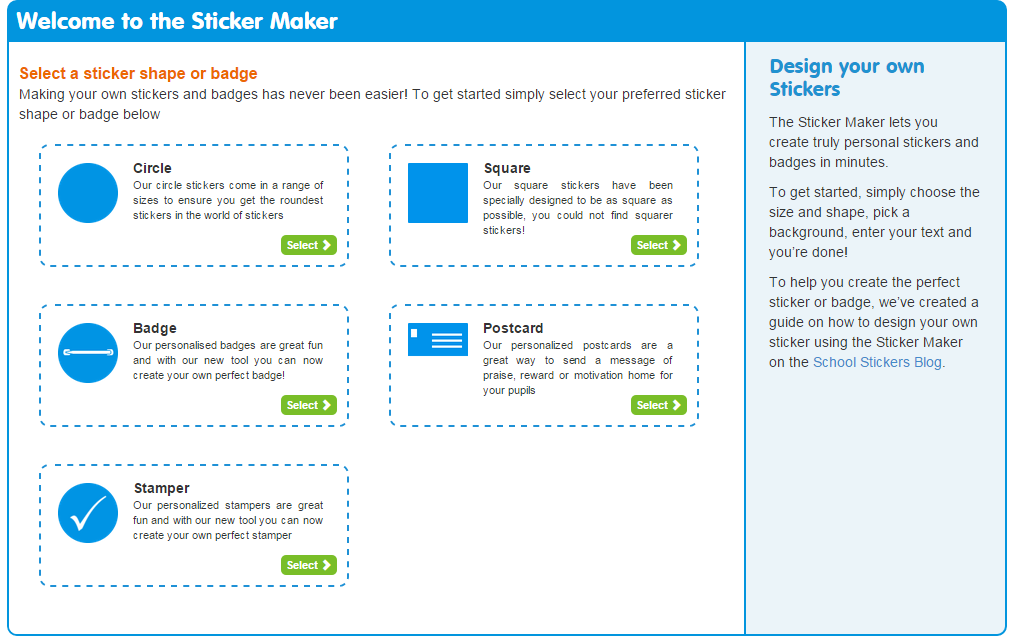
Would you like circle or square stickers? Now is the time to decide.
Step 2: And your size..
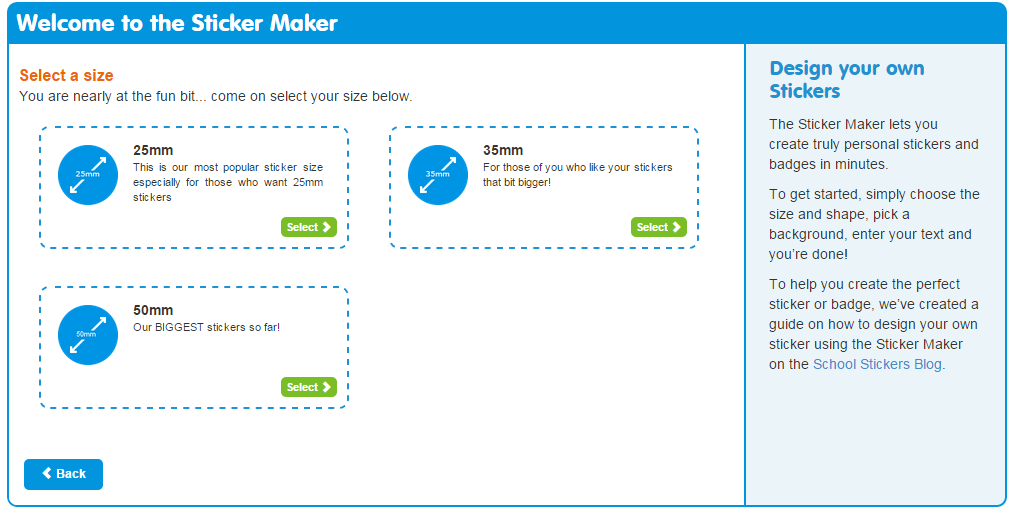
I clicked on circle which means I got these options, if you click on square, sticker maker will take you straight through to the creating page because we only have one size of square stickers (25 x 25mm) which leads onto…
Step 3: Let the creating begin
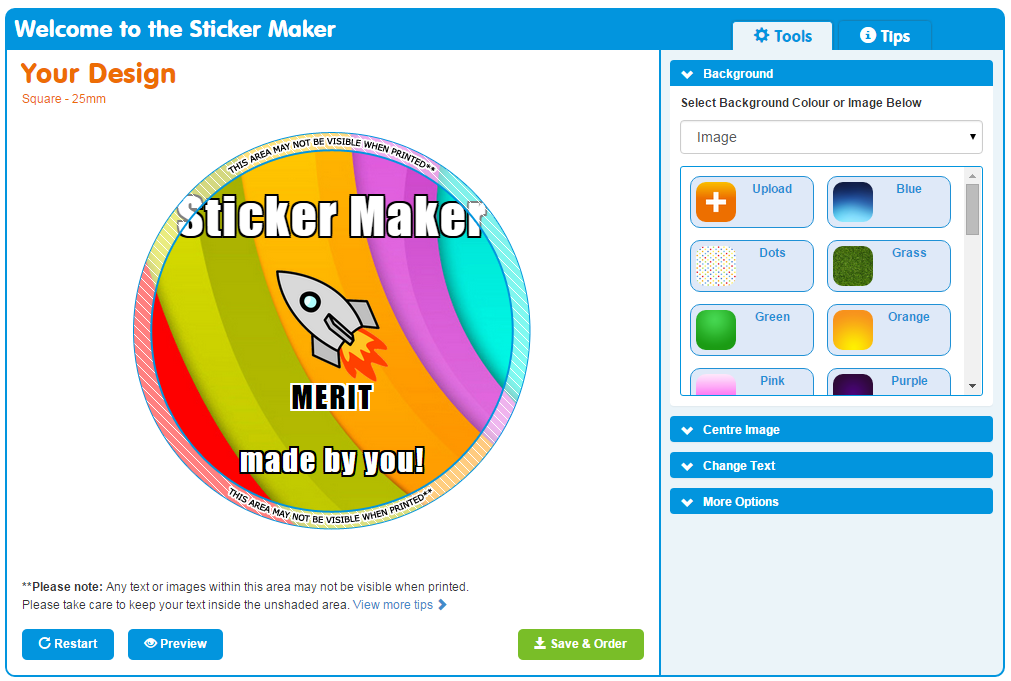
This is the fun part! The first thing we advise to do is read all of the small text on and around the sticker. You’ll notice advice to keep your text in the unshaded area, details on which size and shape of sticker you’ve chosen to design and you’ll see the different steps on the right hand side. 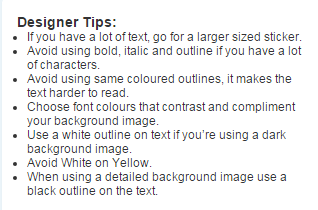
If its the first time you’ve used our sticker maker you’ll notice a tips tab on the right, next to the design steps. Click on it and read the most important tips from our designers, including which colours to avoid and how to make sure your text stands out.
Step 4: Deciding on your background
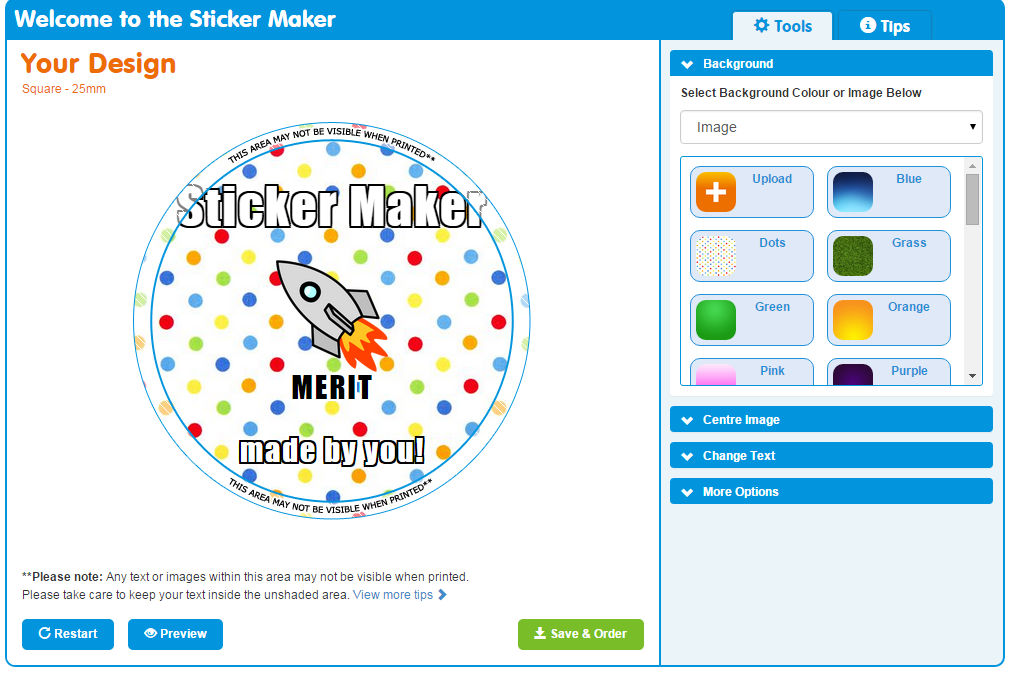
This is my favourite part! Picking your background sets the tone for your whole sticker. You can pick from one of our designs (I love the dots) or you can upload your own image.
Step 5: Your centre image
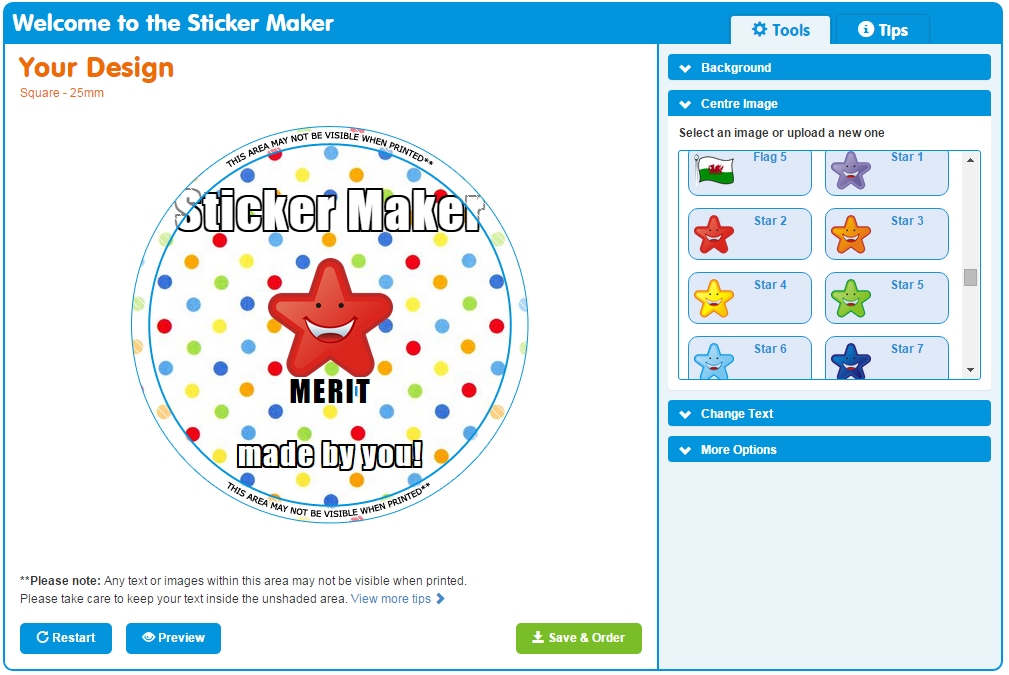
Once again, you can use one of our stock images (like this smiling red super star) or upload one of your own. Lots of people decide to select no image too which is great if your background image is the main focus of you design!
Step 6: Your text
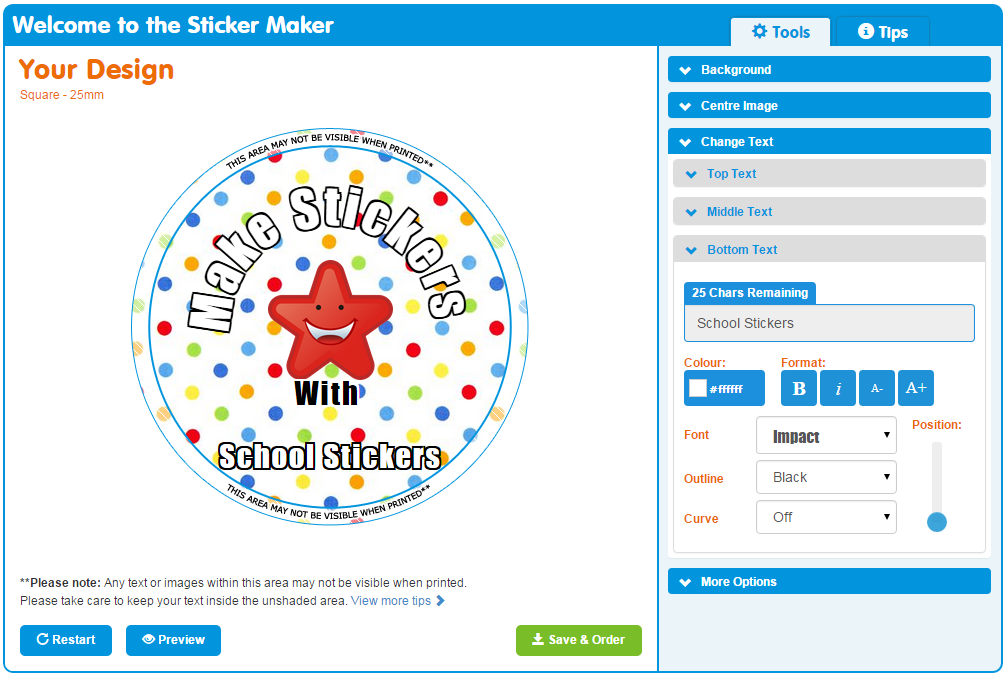
This is the part that really makes your stickers stand out from the crowd. You can enter any text you’d like into the custom text boxes and we’ll print it for you. The only thing you need to do in ensure you stay within the unshaded area of the sticker.
You can:
* Have top, bottom and middle text or, any variation of those options.
* Select your text to read straight across, curved or only a tiny bit curved
* Select from a huge range of fonts, colours and outlines and decide what looks best on your sticker.
* Spend as much time as you’d like getting your text the way you’d like it.
Step 7: Add your MyStickers codes 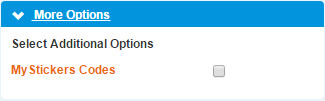
MyStickers is our website and app for your pupils to keep track of how many rewards they’re collecting by entering the codes they receive on their stickers, postcards and certificates. You can read all about MyStickers here and book your free online demo of Carrot Rewards, our tailored school reward system here.
Step 8: Show us what you designed!
Once you’ve ordered your stickers using the save and order button your designs will be printed and dispatched by our team. When you receive them, snap a picture and tag us on twitter @SchoolStickers or, on Facebook. Read here to find out how joining in on social media can help you build up reward points to spend on your next order.
![]()